Stained glass art is a captivating craft that combines artistry and technical skill. This article serves as a comprehensive tutorial for creating your very own stained glass pin. Whether you’re a beginner or an experienced crafter, you’ll discover the joy of transforming simple materials into a beautiful and unique piece of art.
Understanding Stained Glass
History of Stained Glass Art
The history of stained glass art dates back centuries. Early examples of stained glass windows adorned cathedrals, churches, and other significant buildings, using colored glass to create stunning visuals that depicted biblical stories and historical events. The intricate stained glass panel served not only as decorative elements but also as a medium for storytelling and religious instruction, captivating audiences with their vibrant colors and elaborate designs. As time progressed, this form of glass art evolved, influencing various artistic movements and finding new applications in both religious and secular settings, allowing artisans to create stained glass projects.
Types of Stained Glass
There are various types of stained glass to choose from, each with its own unique characteristics. Traditional stained glass involves cutting glass pieces and joining them together using solder and zinc came. Faux stained glass offers a simpler alternative, using clear plastic and acrylic paint. The faux allows for experimentation with color and design, making it ideal for beginners.
Materials Used in Stained Glass
To embark on your stained glass DIY journey, you’ll need a few essential materials. Sheet glass, a glass cutter, copper foil, and a soldering iron are crucial. Other helpful tools include a grinder and a pattern as a guide. With these materials, you can begin to create stained glass pieces.
DIY Stained Glass Pin Project
Gathering Your Materials
Before you start your stained glass DIY adventure for creating a unique stained glass pin, gathering the necessary materials is crucial. You’ll need sheet glass of your preferred colors and textures, ensuring they are suitable for cutting. A reliable glass cutter is essential for shaping the glass pieces according to your pattern as a guide. Acquire copper foil to wrap the edges of each piece of glass, preparing them for soldering. Additionally, you’ll require a soldering iron and solder for joining the foiled pieces. Other helpful tools may include a grinder for smoothing rough edges, and safety glasses to protect your eyes.
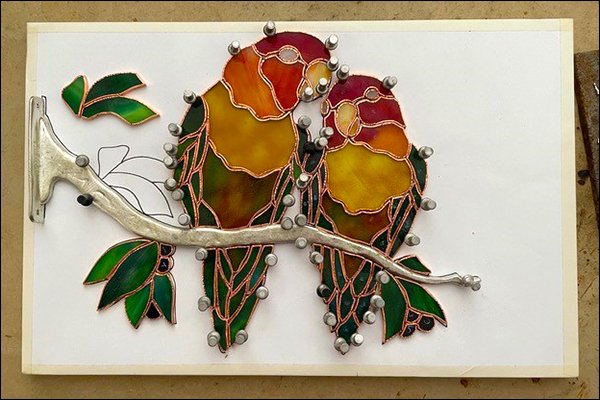
Creating Your Glass Panel
With your materials prepared, the next step in creating your stained glass panel is to transfer your chosen pattern as a guide onto the sheet glass. Using your glass cutter, carefully score along the lines of the pattern to create separate glass pieces. Gently tap the glass to break it along the scored lines. Use a grinder to smooth any rough edges, ensuring a precise fit when assembling your stained glass pieces. Remember to wear safety glasses during this process to protect your eyes from flying debris. You can visit a glass shop to find different types of glass you’ll need.
Using Acrylic Paint for Faux Stained Glass
For a simplified approach to creating stained glass looks, consider using acrylic paint on clear plastic. This method is a form of faux stained glass, allowing you to simulate the beauty of traditional stained glass without the need for soldering or specialized tools. Start by cleaning the clear plastic surface thoroughly. Then, using black acrylic paint or specialized liquid leading, create the outline of your design. Once the outline is dry, fill in the individual sections with glass paint or colored acrylic paint to mimic the colors of a stained glass window. This technique is ideal for creating stained glass projects quickly and easily.
Techniques for Making Stained Glass Pins
Foil Method vs. Solder Method
When you make stained glass pins, the choice between the foil method and the solder method depends on the complexity of your design and desired aesthetic. The foil method (copper foil) is ideal for intricate designs. The solder method (zinc came or lead came) offers a more traditional glass look.
Designing Your Stained Glass Pin
Designing your stained glass pin is where your artistic vision comes to life. Begin by sketching your design on paper, paying attention to the size and shape of each piece of glass. Consider incorporating different colors and textures of sheet glass to add depth and visual interest to your stained glass projects. Use a pattern as a guide when cutting the glass. You may want to visit a glass shop to find inspiration. Remember to keep your design relatively simple, especially if you’re new to stained glass DIY, to ensure a manageable and satisfying project.
Applying Enamel for Finishing Touches
Applying enamel for finishing touches can elevate your stained glass pin to a new level of artistry. Enamel, available as glass paint, can be painted or screened onto the surface of the glass before being fired in a kiln. This process allows the enamel to fuse with the glass, creating permanent designs and intricate details. Consider adding subtle shading or outlining with enamel to enhance the visual impact of your stained glass window. Properly applying enamel will help you to create stained glass projects that have depth.
Tips for Successful Stained Glass Art
Common Mistakes to Avoid
To ensure success in your stained glass DIY journey, be aware of common mistakes. Always wear eye protection. Use a grinder to smooth rough edges. Provide adequate ventilation when soldering. Use flux when soldering.
Maintaining Your Stained Glass Creations
Proper maintenance is essential to preserve the beauty and longevity of your stained glass panel. Regularly clean your stained glass art with a soft cloth and mild soap and water to remove dust and grime. Avoid using harsh chemicals or abrasive cleaners, as they can damage the glass and solder. Handle your stained glass window with care to prevent breakage, and consider displaying it in a location away from direct sunlight to prevent fading of the colors. Also, be sure that the zinc came or lead came remain intact to provide full support.
Inspiration for Future Projects
Seek inspiration for future stained glass projects from a variety of sources. Explore galleries, museums, and online platforms to discover diverse styles and techniques in glass art. Experiment with different colors, textures, and patterns as a guide to push your creative boundaries. Consider incorporating found objects, such as beads or stones, into your designs to add unique embellishments. Embrace experimentation and allow your personal style to shine through in your stained glass pieces. Remember, the best way to create stained glass art is to start with a simple stained glass pin.